Learn how to how to peel and devein shrimp and you'll never buy it without the shells again! And you'll save money, to boot.

Why you Should Peel and Devein Shrimp Yourself
- If time allows when you're cooking, starting from scratch is always best. The fresher, the better!
- When you peel and devein shrimp at home it can also save you money. The cost of shrimp per pound is considerably more expensive if the work has been done for you. Makes perfect sense, but it's really easy to do yourself, and from my experience, it's the sort of kitchen work that can be a very zen-like activity.
Lets get to it . . .
Peeling Shrimp and Removing the Vein
- Gently pinch the tail and segment or two of shell closest to it. As you pinch, pull it in the direction of the tail, right off the flesh. Still working with your fingers, gently pinch the remaining center legs, up, over and around the flesh.


- Use a very sharp paring knife to make as shallow a slit as possible, down the back of the shrimp.
- Continue the slit all the way down to the where the tail was. You may see nothing, or a tiny bit of a vein at some point -- or it may run through the entire back.


Here's an example of one that's mostly clean, except for one small area. Use the tip of the knife to lift the vein out.


That's it!
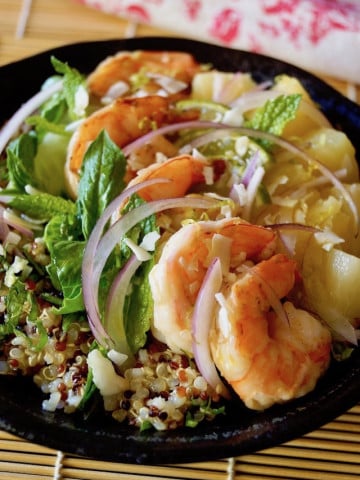
A Few Must-Try Recipes with Shrimp


Cooking On The Weekends is a participant in the Amazon Services LLC Associates Program, an affiliate advertising program designed to provide a means for sites to earn advertising fees by advertising and linking to Amazon.com.


Robert
How about the vein on the bottom of the shrimp? Does this need to be removed too?
valentina
Hi Robert. No, you do not need to remove that one. It's usually white and there's no real food safety reason to remove it, but if it bothers you, it won't hurt anything to remove it. Hope this helps and thank for visiting COTW!