These Nutella Brownies are gluten-free and have only 4 ingredients. Over-the-top fudgy, creamy and dreamy, this treat will make everyone happy. With a special Valentine's Day version included, I think you might just fall in love with them.

Not sure if it's because my name is Valentina, or because I clearly inherited my mom's devotion to chocolate, but I've always loved Valentine's Day.
Rich and fudgy, Nutella Brownies could not be more Valentine's Day appropriate -- especially the special heart-filled version at the bottom of the post. They're a Nutella lover's dream.
The Ingredients

(I often suggest brands I love and use — these are only suggestions and this is not a sponsored post.)
- Nutella - You will need the 26.5-ounce jar, and you'll have some leftover.
- cocoa powder - I like Scharffen Berger's Unswetened Natural Cocoa Powder.
- baking powder - If you don’t bake regularly, it’s a good idea to check to be sure your baking powder is still good. To do so, pour a couple of tablespoons of boiling water over about ¼ teaspoon of the baking powder. If it starts to fizz, it’s still good.
- eggs
(See recipe card below for quantities.)
Substitutions
- I like to keep it very Nutella-y, but if you're making them for Valentine's Day, they'd also be adorable if you filled the hearts with pink or red frosting.
- If there's a chocolate-hazelnut spread that you prefer over Nutella, with a similar consistency, you can substitute with it. The final texture of the brownies will likely vary with different brands.
Recipe Tips
- To avoid having the cocoa powder get all over your workspace, before using the electric mixer, use a large spoon to combine the ingredients.
- The longer you let the brownies cool, the easier they will be to slice, and to make the hearts (if you're adding them).
- If you want the extra Nutella, but want to save time, rather than make the hearts, you can spread a thin layer on top of the brownies, like frosting. (FYI, these are incredibly rich without the extra bit.)
- If you're making the hearts, use the top of a chopstick to help push the cut-out piece of brownie out of the cutter.
- As you can see, these brownies are not super neat squares. To make them super neat, with straight edges, once the pan has come to room temperature, place it in the freezer for about 15 minutes before slicing.
- For little round Nutella brownies, you can use a mini muffin pan and line it with paper baking cups. Fill them about halfway to three quarters full, and you should get around 24+.
How to Make Them
- Preheat the oven to 350°F and line an 8 x 8-inch baking pan with parchment paper. Pictured below is the easiest way to do this. Imagine you’re wrapping a gift. Place pan upside down, lay a parchment paper on top and fold the it to fit tightly over the corners. Then turn the pan over and insert the folded parchment inside.


- Add the Nutella, cocoa powder, baking powder and eggs to a mixing bowl and mix until smooth.
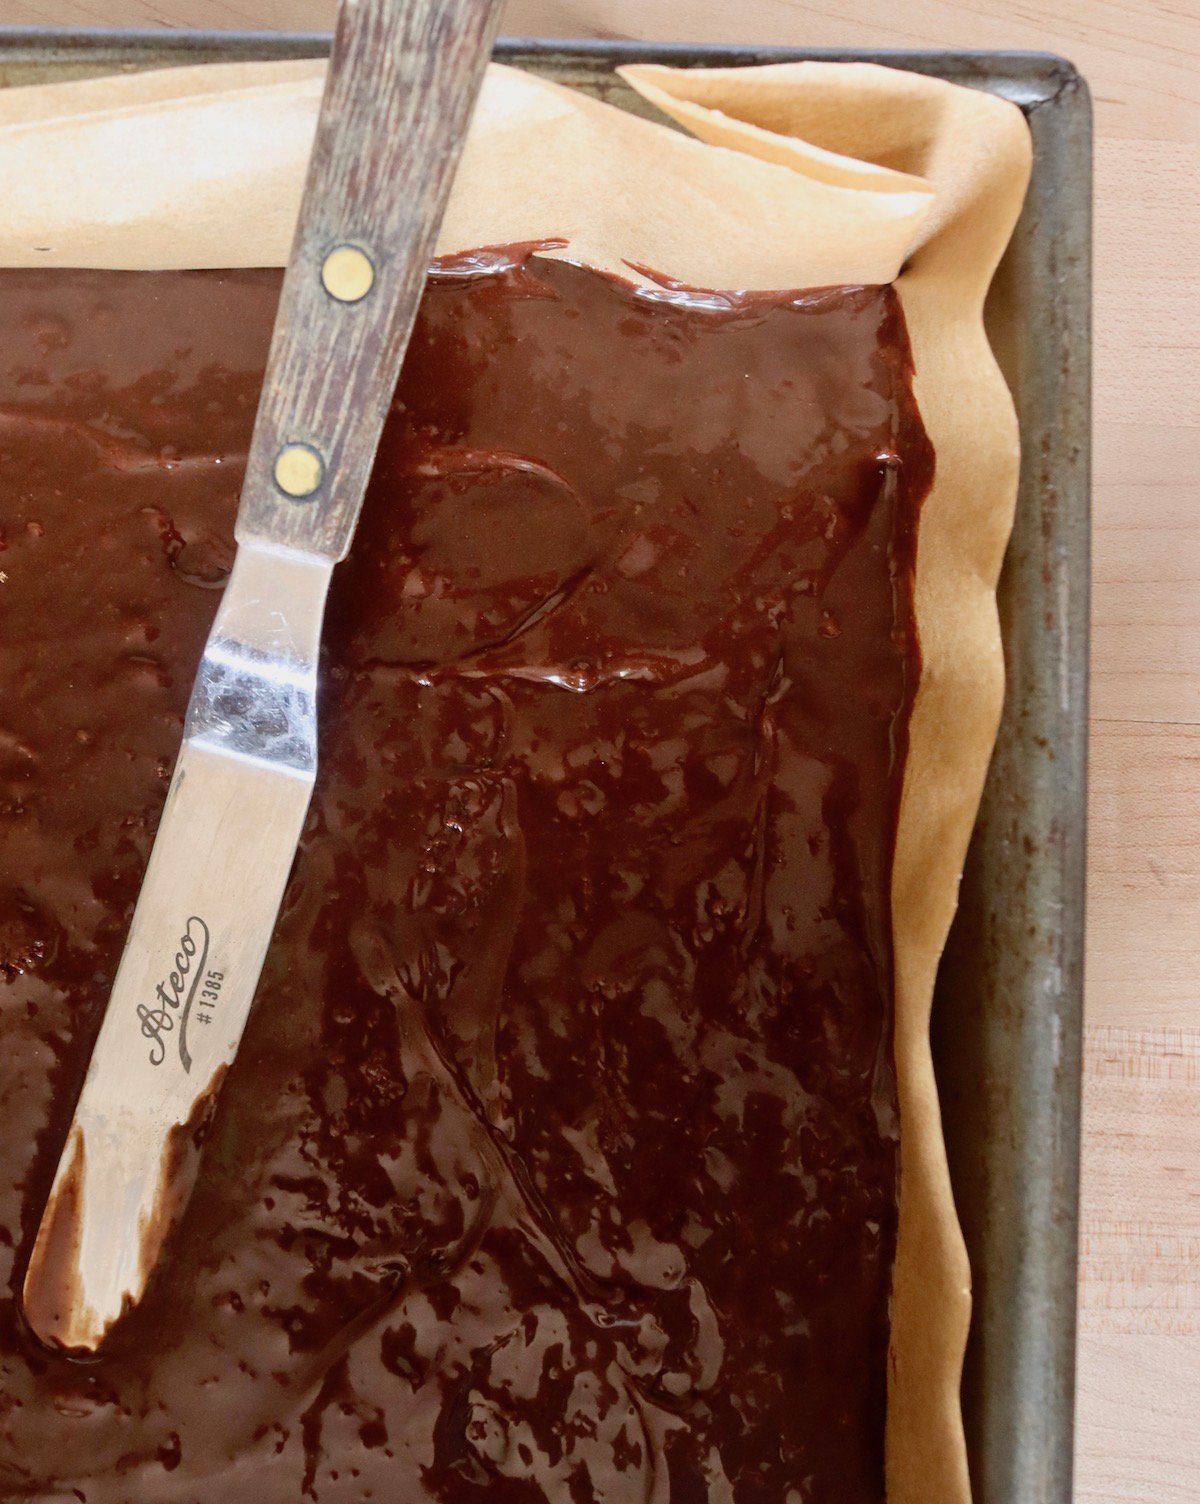
- Pour the batter into the prepared baking pan and spread it evenly. Bake in the preheated 350°F oven until the edges begin pulling away from the sides.

- Place the pan on a cooling rack and let it sit for at least 30 minutes. Then lift it out of the pan with the parchment paper. Slice it into about 25 squares. (If you're adding the hearts, make 16 instead, so they're a bit bigger.)
To add the hearts (optional) . . .
- Use a tiny heart-shaped cookie cutter (about ¾-inch) to cut out a small heart on top of each brownie. DO NOT push the cutter all the way to the bottom of the brownie -- about half way is perfect. Once the cutter is in the brownie, gently pull it up. This will pull out a bit of the brownie in a little heart shape.

- Add Nutella to a small zip-lock bag and cut a tiny bit off of one of its bottom corners. Then, holding the open tip close to the bottom of each hollowed out heart, squeeze gently to fill it up.

(More detailed instructions are in the recipe card below.)

Serving Suggestions
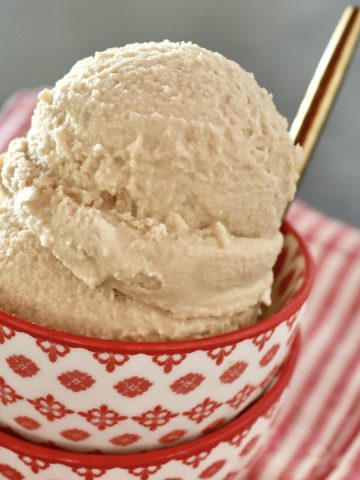
- For an excellent, fun dessert, break the Nutella Brownies into little pieces to top a scoop or two of vanilla bean ice cream.
- You can also warm the brownies and add a scoop of ice cream on top to slowly melt into a creamy vanilla sauce.
- Since the brownies are so fudgy, for guests, I like serving them in mini paper baking cups. (Tip: By gently pressing down on the top of a stack of baking cups, you can make them bigger, to fit different sizes of brownies or other treats.)
More Mouth-Watering Recipes with Nutella
- Nutella Waffles (with Gluten-Free Option)
- No-Bake Nutella Pie with Hazelnut Praline
- Nutella Chocolate Chip Cookies
Storing the Brownies
- Room temperature. Nutella Brownies will keep for about 4 days in an airtight container at room temperature. (This is when they're best.)
- Refrigerator. In an airtight container, they’ll last about a week in the refrigerator.
- Freezer. In an airtight container or freezer bag, the brownies will last up to 3 months in the freezer.
- If you’ve made the hearts, or spread Nutella over the top, and want to store them in layers, place a sheet of wax paper between each layer.
Valentine's Day or not, I hope you find my gluten-free Nutella Brownies as heavenly as I do.

Nutella Brownies Recipe
Equipment
- mini cookie cutter set with heart optional
Ingredients
- 1½ cups Nutella
- ½ cup cocoa powder sifted
- 1 teaspoon baking powder
- 3 large eggs
For the hearts
- ¼ cup Nutella
Instructions
- Set oven and prep pan. Heat the oven to 350°F and line an 8 x 8-inch baking pan with parchment paper.
- Make batter. Add the Nutella, cocoa powder, baking powder and eggs to a medium-sized mixing bowl. Use an electric hand mixer to blend everything together until smooth.
- Bake. Pour the batter into the prepared baking pan and spread it evenly. Bake in the preheated 350°F oven until the edges begin pulling away from the sides and it's no longer wiggly in the center, about 25 minutes.
- Cool and slice. Place the pan on a cooling rack and let it sit for at least 30 minutes. Then carefully lift it out of the pan with the parchment paper. Place it on a cutting surface and slice it into about 25 squares. (If you're adding the hearts, it's a bit easier if you slice 16 instead, so they're a bit bigger.)
For the hearts
- Use a tiny heart-shaped cookie cutter, about ¾-inch at the widest part, to cut out a small heart on top of each brownie. DO NOT push the cutter all the way to the bottom of the brownie -- about half way is perfect. Once the cutter is in the brownie, gently pull it up. This will pull out a bit of the brownie in a little heart shape, and will only work if the brownies are not too warm. (Save these cute brownie hearts and serve as part of this treat!)
- Add the ¼ cup of Nutella to a small zip-lock bag and cut a tiny bit off of one of its bottom corners. Then, holding the open tip close to the bottom of each hollowed-out heart, squeeze gently to fill it up. You can use a toothpick or the tip of a knife to spread it evenly if necessary.
NOTES
NUTRITION
Cooking On The Weekends is a participant in the Amazon Services LLC Associates Program, an affiliate advertising program designed to provide a means for sites to earn advertising fees by advertising and linking to Amazon.com.

Mimi Rippee
Oh boy. I know these are fabulous! I love brownies made with cocoa! And Nutella is just icing on the cake!
Valentina
Agreed! Thank you, Mimi. 😀 ~Valentina
Liz
Oooh, these are fabulous! And the heart cutout is such a cute idea for Valentine's Day!!
Valentina
Thanks, Liz. Happy (early) Valentine's Day. 🙂 ~Valentina
Marissa
I'm always up for brownies and Nutella, so you know these are calling my name, Valentina! And I love that they're gluten free.
Valentina
Thanks, Marissa! Enjoy. 🙂 ~Valentina
Susan A McClain
Made your Nutella brownies recipe today. Everyone loved them. I topped them with strawberry heart gummies. The bottoms stuck to my mini muffin pan. Next time I will grease them with plenty of butter & use whole wheat flour dusting instead of coconut flour. They taste like a dark chocolate brownie. Plan on making them again soon. Thanks for an excellent way to use nutella!
valentina
Hi Susan, Thanks so much for writing in! So happy you enjoyed these tasty treats. As far as I'm concerned, there's no such thing as too many ways to eat Nutella. Happy early Valentine's Day! 😉 ~Valentina
David
These look absolutely incredible! Happy Valentine’s Day to you, Valentina, and thanks for all your wonderful recipes throughout the year! I love them all – and, if nothing else, Valentine’s Day is about love.
valentina
Awww, I love this David. Thank you. Hope you had a lovely Valentine's Day too! XOXO
David Scott Allen
These have been a favorite for years now... everyone (except our current guest, who hates anything with hazelnuts) loves them.
Emily
I made these babies last night and used a mini muffin pan. SO CUTE! And yummy! They were a hit at work. Thanks for sharing!
valentina
Emily, so happy you tried them -- and made so many people happy at work! Yay! 😀