• Skip to primary navigation
  • Skip to main content
  • Skip to primary sidebar
Cooking On The Weekends
  • About Valentina
    • Press
    • Contact
  • Recipe Index
  • "How To"
  • Work with Me
menu icon
go to homepage
  • About Valentina
    • Contact
  • Recipe Index
  • Collaborate
    • Facebook
    • Instagram
    • Pinterest
  • search icon
    Homepage link
    • About Valentina
      • Contact
    • Recipe Index
    • Collaborate
    • Facebook
    • Instagram
    • Pinterest
  • ×

    Home » Gluten-Free, Savory » Smashed Potato Pizza Crust

    Smashed Potato Pizza Crust

    Feb 24, 2023 · by Valentina · 25 Comments

    This post may contain affiliate links.

    Jump to Recipe

    This Potato Pizza Crust is a brilliant gluten-free crust made out of a whole Russet potato. That's it! A one-ingredient crust, and it's really amazing!

    One big smashed Russet potato that's been sautéed, on parchment paper.

    There are all sorts of gluten-free pizza crusts available these days, but I assure you, this is one you won't find in any market.

    This potato pizza crust is simply one large smashed potato. (This is not to be confused with mashed potato pizza crust or a grated potato crust, which are both quite different.) The smashed potato makes for an incredibly crispy and delicious potato pizza base for essentially any toppings you like.

    Jump to:
    • The Ingredients
    • Recipe Tips
    • How to Make it
    • Serving Suggestions
    • More Smashed Potato Recipes
    • Making it Ahead
    • Does it taste or behave like a typical pizza dough?
    • Can you make this crust with a sweet potato?
    • Smashed Potato Pizza Crust
    One side edge of a potato pizza crust on parchment paper.

    The Ingredients

    (I often suggest brands I love and use — these are only suggestions and this is not a sponsored post.)

    • Russet potato - Choose potatoes that are firm, smooth and free of sprouts. For this recipe, the more evenly shaped the potato the better.
    • extra virgin olive oil - I like this one. (You can also use regular olive oil.)
    • salt - Potatoes love salt! I cook (and bake) with Kosher salt. I prefer it for a few reasons: its larger flake size, it's less refined and usually doesn't contain additives, and it does a great job enhancing the flavor of foods without making them taste salty.
    • black pepper - Preferably freshly ground.

    (See recipe card below for quantities.)

    Recipe Tips

    • To save at least 1 hour, you can bake the potato in a microwave. I've made the potato pizza crust by baking it in the oven and microwave, and both work well. (Instructions for both methods are below.)
    • Be sure to use all 2 tablespoons of the olive oil when you're coating the bottom of the skillet. Not only will it keep it from sticking to the pan, but it is part of what makes it crispy.
    • It's important to use the right size pan, so it's easy to invert the smashed potato onto the baking sheet when it's done sautéing. Ideally it should be a 10-inch pan. (I use a 10-inch cast iron skillet, which works well. A lighter skillet is a bit easier for inverting -- use what feels comfortable. And non-stick is okay, too.)
    • My final tip is not to be daunted by the numerous steps to make this crust -- each one is quite simple, the visual step-by-step guide will be very helpful to look at as you make it.

    How to Make it

    Step 1:  Preheat the oven to 425°F, and adjust a rack to the center.

    Step 2:  Start with a large Russet potato - use an approximately 1-pound potato for a 10-inch pizza crust.

    Step 3:  After you wash and dry the potato, rub the skin with olive oil and sprinkle it with salt and pepper.

    Large raw Russet potato on a black surface.
    Large Russet potato on black cutting board sprinkled with salt.

    Step 4:  Use a fork to make several pricks all around the potato.

    Step 5:  Place the prepared potato on a baking sheet or heavy-duty foil, and place it in the preheated oven.  Bake until it's fully cooked and tender. This should take 1 to 1½ hours. Turn the potato over about half way through the cooking time.

    * Alternately, if you want to save time, use a microwave instead of the oven. Once the potato is pierced, place it on a paper towel in the microwave and turn it on high for 4 minutes. Flip it over and microwave for 4more minutes. (Times may vary.)

    Large Russet potato with a fork stuck in it, on a black cutting board.
    Large Russet potato on black cutting board with salt and tiny holes from a fork.

    Step 6:  Turn the oven down to 400°F now if you're going to add toppings and immediately make a pizza after making the crust. Otherwise turn it off.

    Step 7:  Coat the bottom of a 10-inch skillet with olive oil and sprinkle it with salt and pepper. Place the baked potato in the center of the skillet.

    Step 8:  Place a piece of parchment paper directly on top of the potato, and then place a second skillet, the same size or a bit smaller, on top of it. Gently press down on the center of the inside of the top skillet until you can feel that the potato has flattened just about to the edges of the pan.

    Step 9: Remove the top skillet and the parchment paper.

    One whole baked potato in an oiled cast iron skillet.
    Two skillets, one on top of the other, with parchment paper between them, and a baked potato beneath it.
    Two skillets, one on top of the other, with parchment paper between them.
    Skillet with a smashed potato under parchment paper.
    Skillet with a smashed potato under half a sheet of parchment paper.
    One large smashed Russet potato in a cast iron skillet.

    Step 10: Place the pan over medium heat and sauté until the bottom is golden and crispy, about 8 minutes. You can check by using a small spatula to gently lift it at its edge.

    Step 11:  Line a baking sheet with parchment paper and drizzle more olive oil over the top of the smashed potato. Then place the parchment-lined baking sheet upside down, on top of the sauté pan.

    Step 12: Using two pot holders, invert the smashed potato onto the parchment-lined baking sheet.

    Large smashed Russet potato in cast iron skillet over high flame on stove.
    Upside down baking sheet with parchment over cast iron skillet with smashed potato.
    Large, golden and crispy smashed potato on parchment paper.

    Step 13:  At this point you would add your choice of toppings to make your favorite pizza recipe. Bake until the bottom is crisp, cheese is melted and the toppings are hot.

    Potato pizza crust with basil leaves and sliced tomatoes.

    (More detailed instructions are in the recipe card below.)

    Top view of a large crispy smashed Russet potato on parchment paper.

    Serving Suggestions

    • This recipe is for a small pizza for a main course for two. You can cut it into as many slices as you'd like and share it with more people for an appetizer.
    • The possibilities are endless as far as pizza toppings go -- like they are for any type of pizza crust. Top the potato crust with absolutely anything you like.
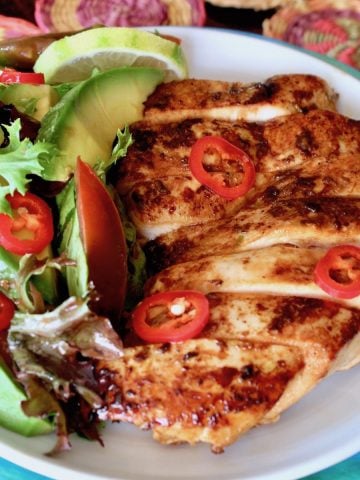
    • A pizza made with this crust is one of my favorite main dishes to serve with fun salads, especially this fried lemon salad.
    • Below are my two favorite examples of recipes using this this potato pizza crust: Smashed Potato Onion-Tomato Pizza and Smashed Potato Egg Pizza with Bacon.
    One slice of tomato and onion smashed potato pizza being held above remaining pizza.
    One slice of bacon and egg smashed potato pizza being held above the rest of the pizza.

    More Smashed Potato Recipes

    • Garlic-Herb Smashed Potatoes
    • Smashed Potato Casserole
    • Curry Smashed Potato Stew

    Making it Ahead

    Ideally, you should use the crust for your pizza right after it's made.

    It can however, be made a few hours ahead of time. Once it's on the baking sheet ready for toppings, let it cool to room temperature and then lightly cover it with foil until you're ready. No need to refrigerate it.

    Does it taste or behave like a typical pizza dough?

    Nope. It's not potato pizza dough, it's a potato that becomes a scrumptious flat and crisp crust. There is no flour, no water, no yeast, etc.

    Can you make this crust with a sweet potato?

    You can BUT, it will be much more fragile and soft. It doesn't stay together nearly as well as the Russet potato does. Additionally, the bottom won't crisp the with the Russet will when you've added the toppings and are baking the pizza. That said, it's still tasty.

    I hope you find this gluten-free potato pizza crust as awesome as I do. (And as tasty!)

    Enjoy!

    Smashed Potato Pizza Crust

    Valentina K. Wein
    This Potato Pizza Crust is a brilliant gluten-free crust made out of a whole Russet potato. That's it! A one ingredient crust, and it's really amazing!
    Please note that if you bake the potato in a microwave, this recipe will only take a little over 20 minutes.
    5 from 3 votes
    Print
    Prep Time 5 mins
    Cook Time 1 hr 40 mins
    Total Time 1 hr 45 mins
    Course Ingredient
    Cuisine American
    Servings 2
    Calories 365 kcal

    Equipment

    • 10-inch skillet
    • parchment paper

    Ingredients


    • 1 (1-pound) Russet potato, washed and dried
    • about 3 tablespoons extra virgin olive oil
    • salt and freshly ground black pepper

    Instructions
     

    • Set oven. Preheat the oven to 425°F, and adjust a rack to the center.

    Bake Potato

    • Rub the surface of the potato with olive oil, sprinkle with salt and pepper, and use a fork to make several pricks all around the potato
    • Place the potato on a baking sheet or heavy-duty foil, and place it in the preheated 425°F oven. Bake the potato until it’s fully cooked and tender. This should take 1 to 1½ hours. Turn the potato over about half way through the cooking time.
      Alternately, you can use a microwave. Once the potato is pierced, place it on a paper towel in the microwave and turn it on high for 4 minutes. Flip it over and microwave for 4 more minutes. (Times may vary.)
    • Turn the oven down to 400°F now if you're going to add toppings and immediately make a pizza after making the crust. Otherwise turn it off.

    Smash Potato

    • Coat the bottom of a 10-inch skillet with 2 tablespoons of olive oil and sprinkle it with salt and pepper. Place the baked potato in the center of the skillet.
    • Place a piece of parchment paper directly on top of the potato, and then place a second skillet, the same size or a bit smaller, on top of it. Gently press down on the center of the inside of the top skillet until you can feel that the potato has flattened just about to the edges of the pan.
      (If it's not spreading as far as you think it can, use a smaller skillet to spread it further.)
    • Remove the top skillet and the parchment paper.

    Sauté Potato

    • Place the pan over medium-high heat and sauté until the bottom is golden and crispy, about 8 minutes. You can check by using a small spatula to gently lift the edge.
    • Line a baking sheet with another sheet of parchment paper and drizzle more olive oil over the top of the smashed potato. Then place the baking sheet upside down, on top of the sauté pan and invert the smashed potato onto it.
    • At this point you would add your choice of toppings to make your favorite pizza recipe. Bake in a 400°F oven until the bottom is crisp, cheese is melted and the toppings are hot.

    Notes

    Calorie count is only an estimate.
    Keywords gluten-free pizza recipes, best gluten-free pizza crusts
    Have you tried this recipe?I'd love to see it on Instagram! Tag me at @cookingontheweekends or leave a comment & rating below.

    Cooking On The Weekends is a participant in the Amazon Services LLC Associates Program, an affiliate advertising program designed to provide a means for sites to earn advertising fees by advertising and linking to Amazon.com.

    More Gluten-Free, Savory

    • Small onion pizza with tomato slices on top with one slice being removed.
      Onion Pizza with Tomato and Basil
    • Roasted red onions, quartered, on a white narrow plate with fresh herbs.
      Slow Roasted Red Onions
    • Skillet Sweet Potato Chicken
    • Yellow-rimmed oval dish with two fillets of sea bass, and fresh fennel all around it.
      Pan Seared Sea Bass with Lemon Pepper Sauce

    Reader Interactions

    Comments

    1. David

      December 21, 2014 at 6:31 am

      What a cool idea - this lends one to all variety of toppings, casual and elegant. I could easily see this with crème fraîche and caviar! Thanks for the (yes) brilliant idea!

      Reply
      • valentina

        December 21, 2014 at 5:48 pm

        David, I love the idea of crème fraîche and caviar on this. (How about bite-sized with little Dutch Yellow potatoes?) Happy Holiday Season!

        Reply
    2. Adair @ Lentil Breakdown

      December 21, 2014 at 7:19 am

      Wow, what a great tutorial! Or you could just eat it as one big-ass hash-brown latke! 🙂

      Reply
      • valentina

        December 21, 2014 at 5:48 pm

        Adair, you might just be the funniest person I know. 😀 xo V

        Reply
    3. Patricia@FreshFoodinaFlash

      December 21, 2014 at 9:43 am

      Valentina - your cleverness always amazes me with a surpise. Keep the ideas flowing!

      Reply
      • valentina

        December 21, 2014 at 5:49 pm

        Thanks so much, Patricia. You always have the sweetest things to say. Happy Holiday season to you and yours! xo

        Reply
    4. John

      December 21, 2014 at 12:43 pm

      Absolutely brilliant! Can't wait to try this, and your photography, yet once again, is simply beautiful.

      Reply
      • valentina

        December 21, 2014 at 5:50 pm

        Thank you so much, John, for the kind words. I hope you try it and love it! 🙂

        Reply
    5. Greg

      December 21, 2014 at 3:11 pm

      Yes brilliant! Happy Holidays. XOGREG

      Reply
      • valentina

        December 21, 2014 at 5:55 pm

        I'll take it- thank you. Happy Holidays to you and Ken. XOXO V

        Reply
    6. Marta

      January 03, 2015 at 3:15 pm

      Hi, I just came across this wonderful recipe!! I LOVE it!! Thank you so much for sharing!! My mind is already thinking ALL the ideas to top this crust! Not to mention I am drooling already too!! LOL... Would be wonderful for Breakfast - topped with scrambled eggs and crumbled Bacon.. I could go on and on... I am
      so Pinning this and heating the oven!! lol.. Thanks Again!! And I agree... BRILLANT!!!!

      Reply
      • valentina

        January 03, 2015 at 6:16 pm

        Thanks so much, Marta! I hope it lives up to its expectations! 🙂 Happy New Year!

        Reply
    7. Courtney

      January 09, 2015 at 9:03 am

      This recipe looks really great! I was wondering if you could bake the potatoes ahead of time and then smash them the next day (or just not right after baking) for a make-ahead option? Or do you think they need to be hot out of the oven for smashing?

      Thanks!
      Courtney

      Reply
      • valentina

        January 09, 2015 at 10:28 am

        Hi Courtney,
        I've tried both and it's much easier right out of the oven -- and it ultimately holds together better. 🙂 Enjoy!

        Reply
    8. Jeff the Chef

      March 10, 2020 at 7:56 am

      This is really interesting. At first, I was thinking that I'd just want to eat it as-is. But then I thought, yeah, a little cheese on top would be great. But then I noticed the version you showed with the fried egg, and yeah, that'd be awesome! What a great idea! I'm a cast iron devotee, so this is right in my lane.

      Reply
      • valentina

        March 10, 2020 at 3:54 pm

        I love it, Jeff. Thanks. So happy we're thinking alike on this one. 🙂 ~Valentina

        Reply
    9. 2pots2cook

      March 11, 2020 at 1:05 am

      WOW ! Another brilliant yet simple one coming out from your kitchen to ours ! 🙂 Beautiful ! Thank you !

      Reply
      • valentina

        March 11, 2020 at 10:37 am

        Thanks so much, Davorka! 🙂 ~Valentina

        Reply
    10. Liz

      March 11, 2020 at 7:13 am

      My potato loving family will go crazy for this crust! The options are endless!!!

      Reply
      • valentina

        March 11, 2020 at 10:36 am

        Yay! Thanks, Liz. Enjoy. 🙂 ~Valentina

        Reply
    11. John / Kitchen Riffs

      March 11, 2020 at 8:03 am

      Mmm, potatoes. This would be the perfect base for so many things!

      Reply
      • valentina

        March 11, 2020 at 10:36 am

        Thanks, John. Enjoy! 🙂 ~Valentina

        Reply
    12. Dawn - Girl Heart Food

      March 16, 2020 at 5:44 am

      We have a bunch of potatoes on hand so trying this out soon! Love how golden brown and crispy it looks! Absolutely delicious, Valentina 🙂

      Reply
      • valentina

        March 16, 2020 at 1:39 pm

        Thank you, Dawn! I hope you both love it. 🙂 ~Valentina

        Reply
    13. Mimi Rippee

      February 25, 2023 at 4:47 pm

      I just love this idea! Still carbs, but no gluten. And it’s like a potato skin with fabulous toppings! Love it!

      Reply

    Leave a Reply Cancel reply

    Your email address will not be published. Required fields are marked *

    Recipe Rating


    This site uses Akismet to reduce spam. Learn how your comment data is processed.

    Primary Sidebar

    Get new recipes
    you’ll love!

    Hi, I'm Valentina, certified chef, owner, recipe developer and photographer at Cooking on the Weekends. I'm also a mom of two boys and a Los Angeleno. I use seasonal whole foods to create unique and comforting recipes for casual entertaining.

    More about me →

    Seasonal Comfort Foods

    • ceramic bowl with Tuscan Bean Stew with green and white striped napkin
      Vegetarian Tuscan Bean Stew
    • Smoky Spanish Smashed Potato Casserole -- These potatoes are deliciously rich, super creamy, and comforting beyond belief. This is the perfect fall side dish to go with braised meats, chicken or even a salad.
      Smashed Potato Casserole
    • Creamy Parsnip Soup with Baby Parsnip French Fries in a purple bowl on a wood with a green floral cloth.
      Creamy Parsnip Soup Recipe
    • Cheesy Pancetta Brussels Sprouts Bake being spooned out of cast iron skillet with an orange spoon.
      Baked Brussels Sprouts with Pancetta

    Spring!

    • Slice of olive oil carrot cake on white plate with spiced whipped cream dollop on top.
      Olive Oil Carrot Cake with Apricot
    • Blue-rimmed plate with asparagus salad and pickled red onions
      Parmesan Asparagus Salad
    • Steamed artichoke with lemons slices between the leaves on a white plate
      Steamed Artichokes with Lemon Beurre Blanc
    • Top view of Spring Lamb Stew with Green Garlic in a cream-colored bowl
      Spring Lamb Stew with Green Garlic

    Footer

    ↑ back to top

    About

    • Privacy Policy
    • Press

    Newsletter

    Get new recipes you’ll love!

    Contact

    • Contact
    • Work with Me

    Review the privacy policy for Cooking on the Weekends

    Copyright © 2023 Cooking On The Weekends, All Rights Reserved